Back to Blog
Tutorial
Featured
Pinned
How to Use MLBB Public Data API Web Project
Complete beginner tutorial to sign in, run endpoint requests, use snippets, read responses, and authorize API docs.
2026-04-04
•
8 min read
Key Points
- • User endpoints require sign-in first
- • Covers both web workspace and Swagger authorization flow
- • Includes response reading and snippet export tips
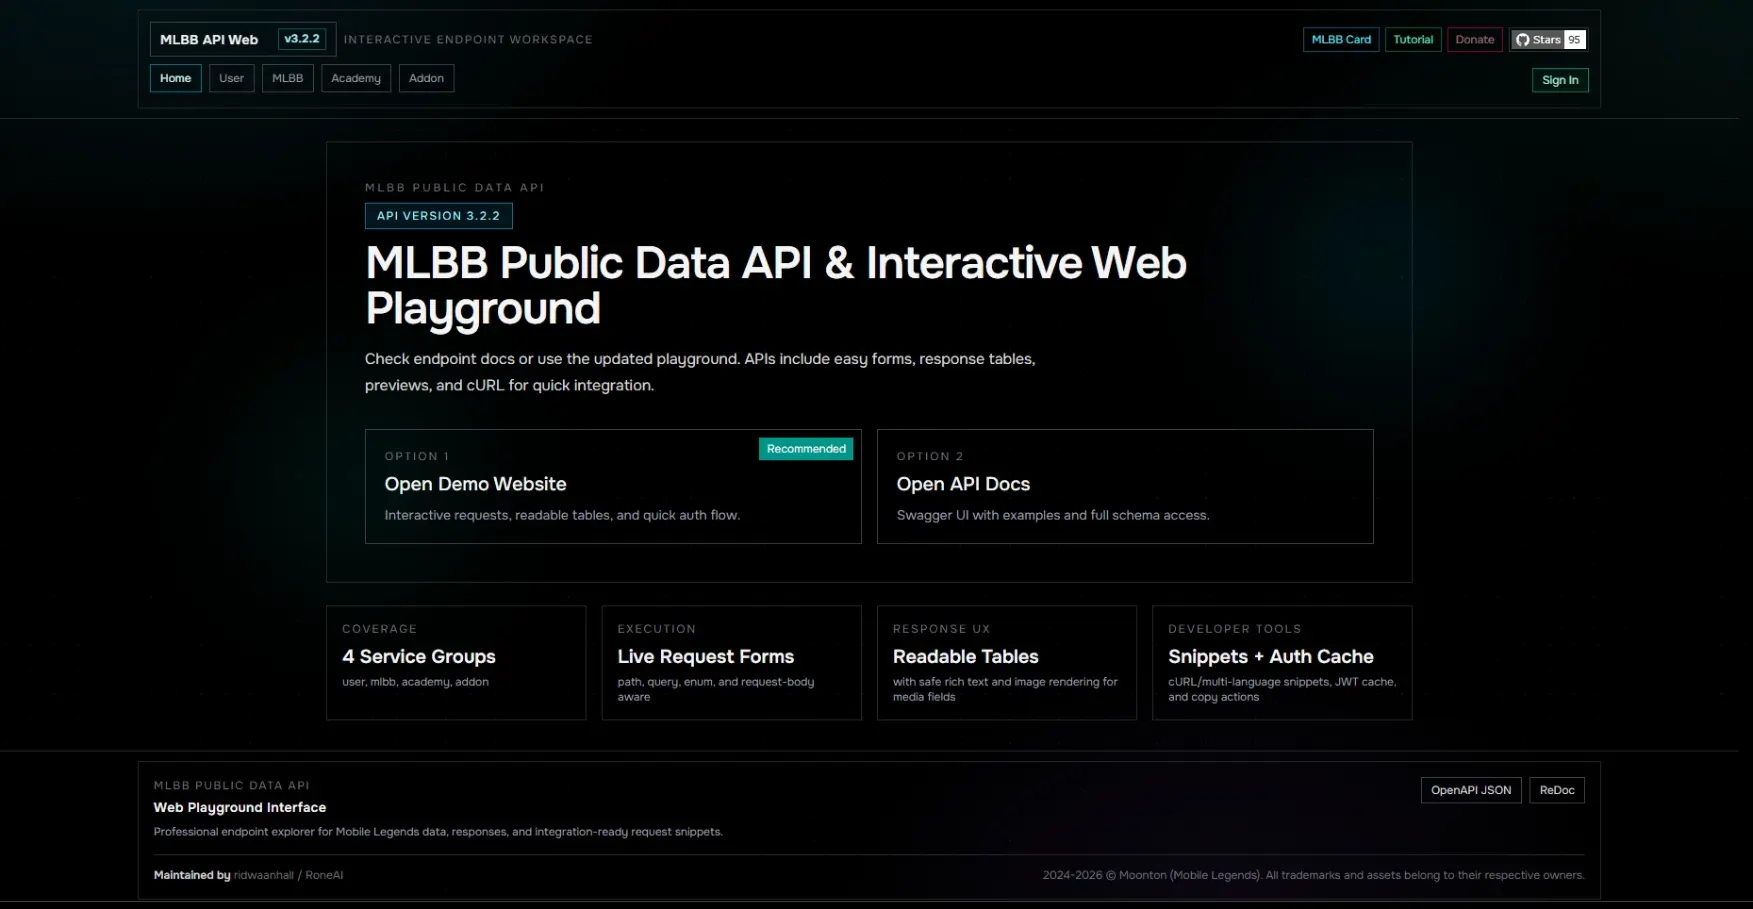
Step 1: Open the Website
Visit https://mlbb.rone.dev. On the home page you will see two options: Open Demo Website and Open API Docs. Start with Open Demo Website if you want the guided interactive flow.
Landing page with clear entry points to web playground and API docs.
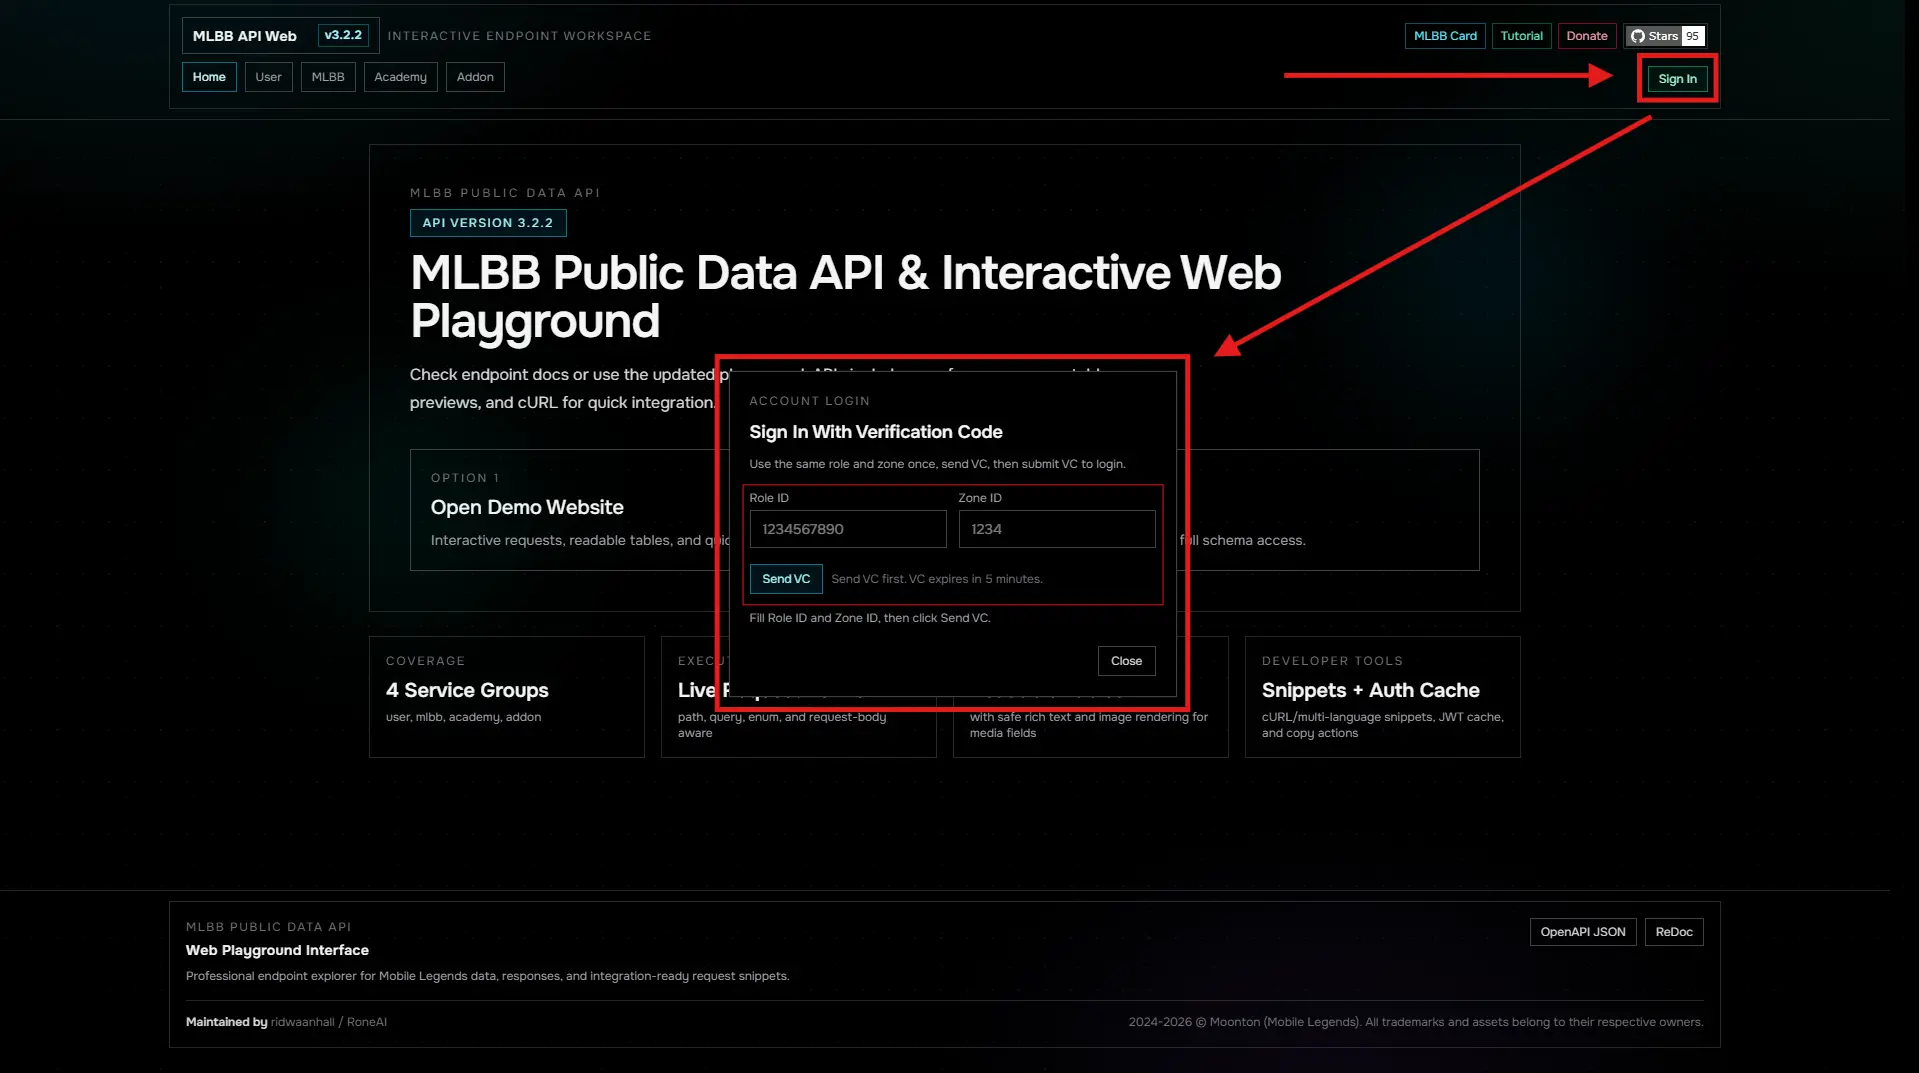
Step 2: Sign In First (Mandatory for User Endpoints)
Click Sign In in the navbar, then fill Role ID and Zone ID. Click Send VC. A verification code is sent to in-game mail and expires in 5 minutes.
- • Without sign-in, user endpoints can fail or return unauthorized responses.
- • This applies to both web endpoint execution and API docs authorization.
Important: User endpoint routes are designed for authenticated usage. Always complete login and keep JWT available.
Sign-in modal with Role ID, Zone ID, and Send VC button.
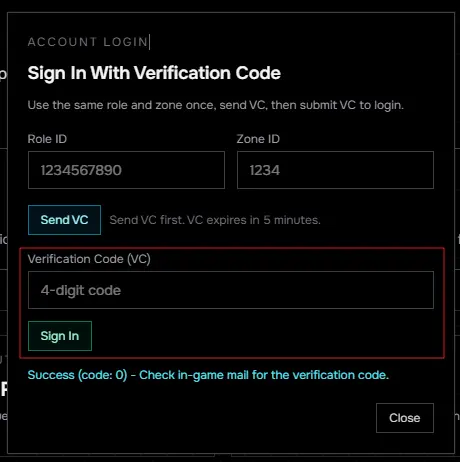
Step 3: Login with VC
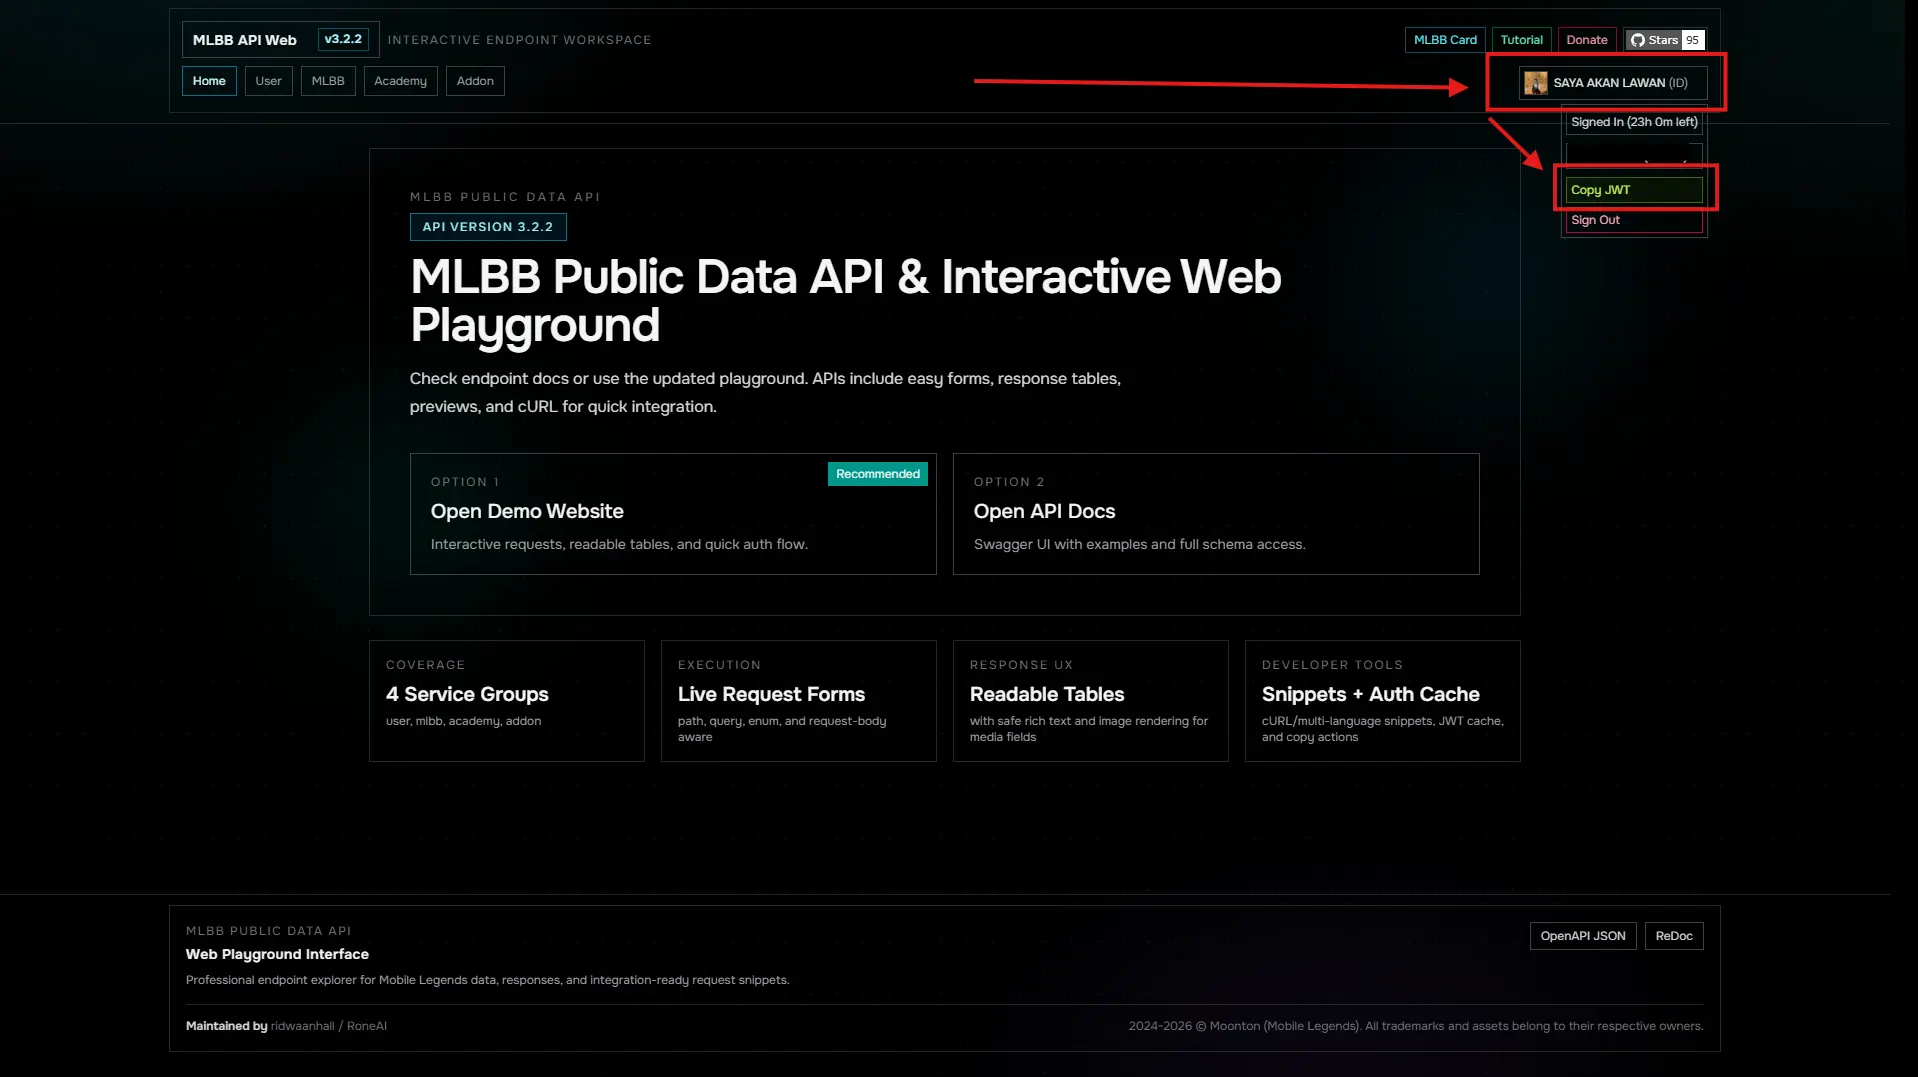
In the same popup, enter VC and click Sign In. On success, navbar shows your avatar, username, and country. Open account panel to view roleId (zoneId) and copy JWT.
Sign-in form with VC input and post-login navbar state showing user details.
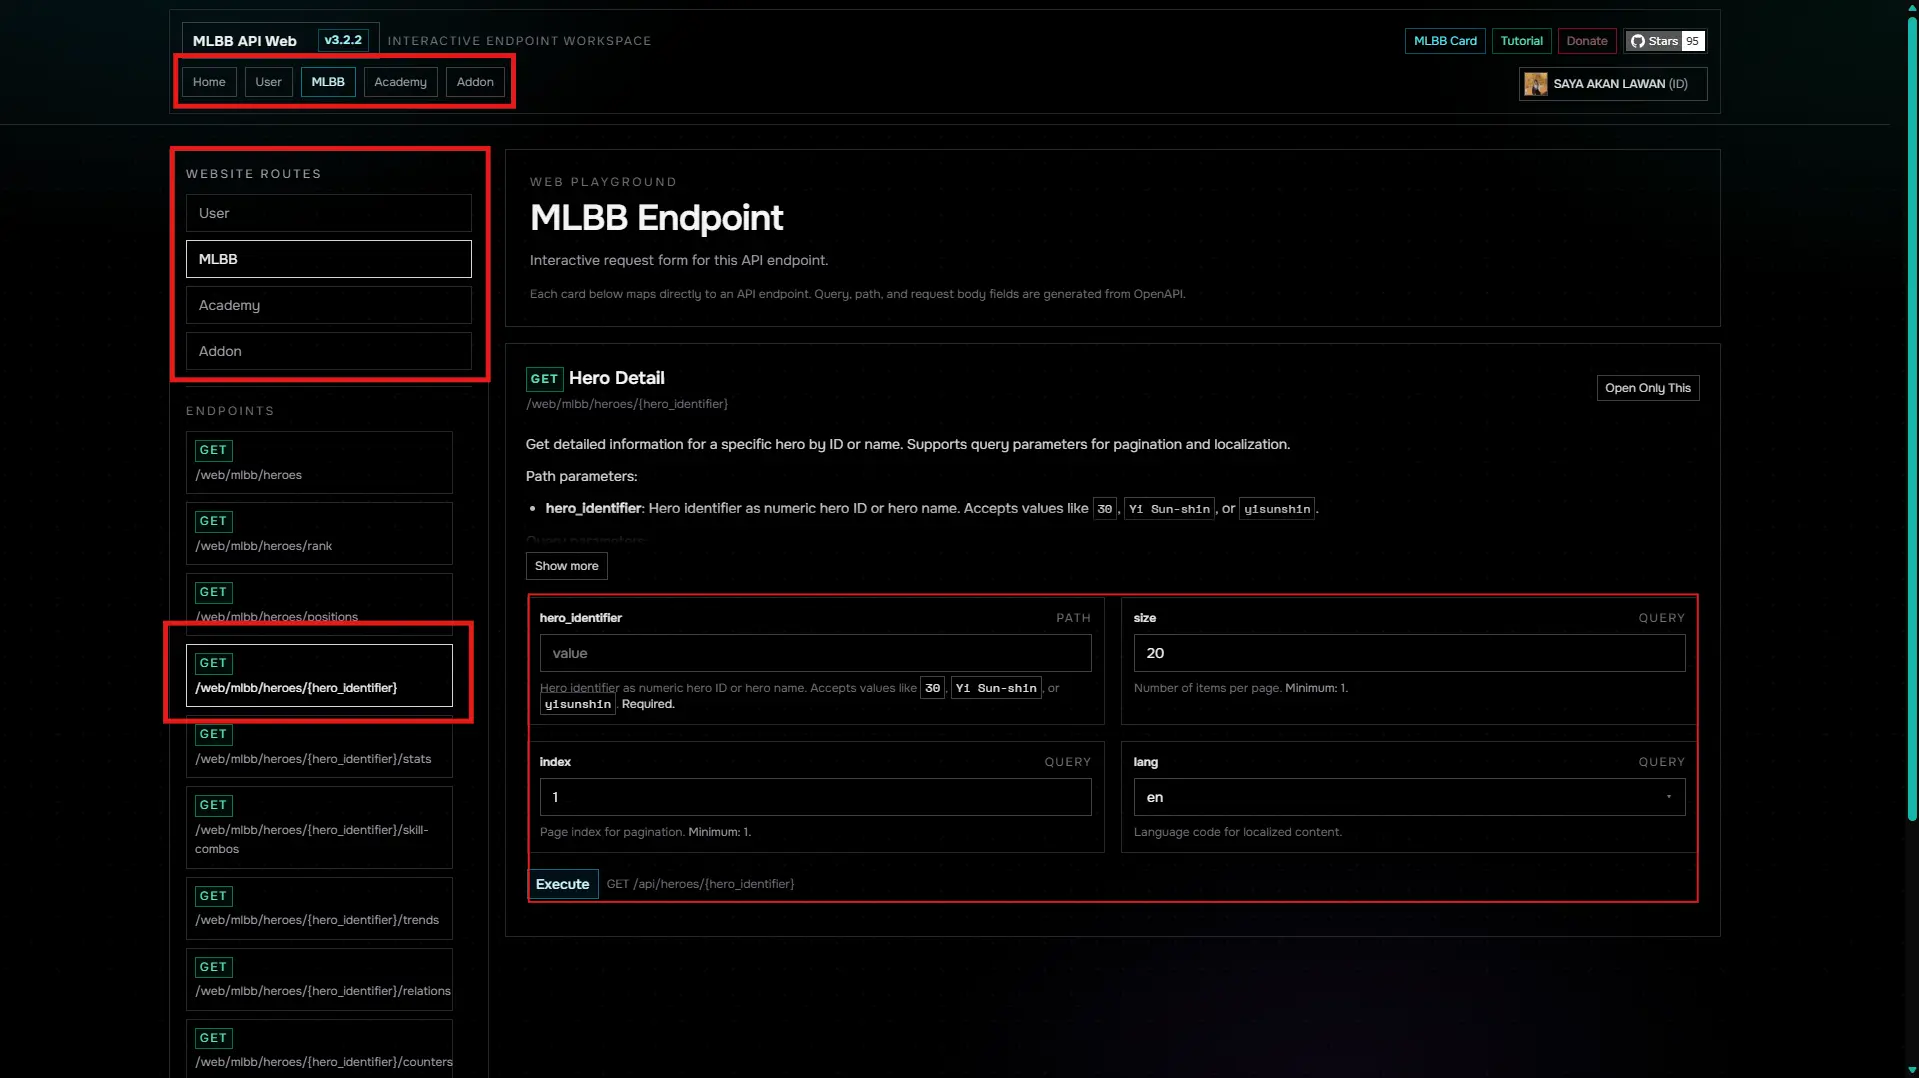
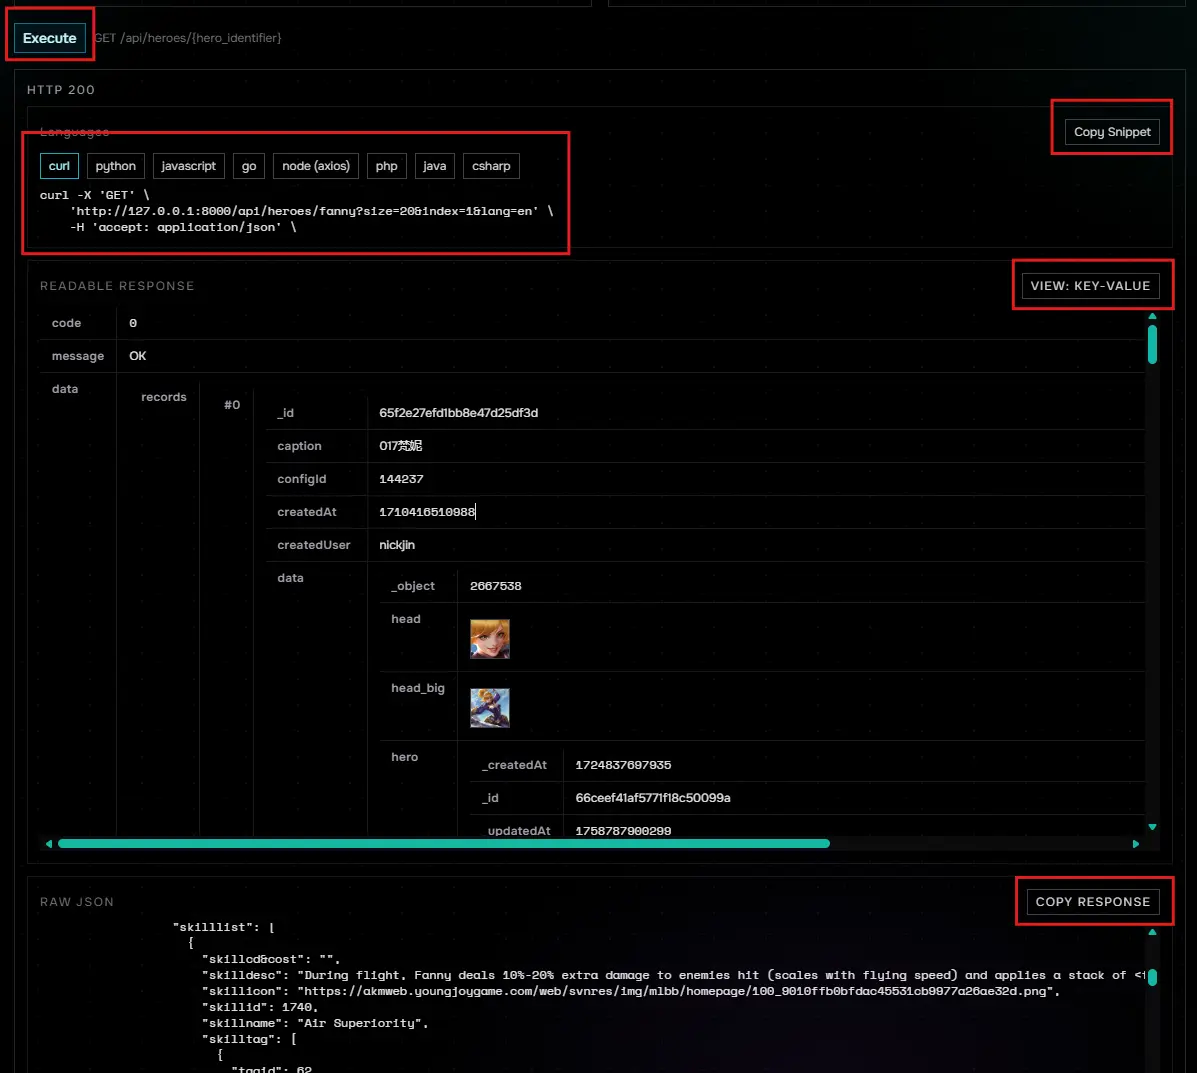
Step 4: Execute Endpoint Requests
Choose a group and endpoint. For example, MLBB hero detail. Fill required parameters like hero_identifier (numeric ID or normalized name), plus optional size/index/lang.
Endpoint execution interface with parameter inputs.
Step 5: Read Responses and Export Snippets
After execution, use snippet tabs (curl, python, javascript, go, node, php, java, csharp) and copy actions. Inspect Readable Response with the view-mode switch, then verify raw JSON if needed.
- • Key-Value mode is best for object inspection.
- • Key As Header mode is best for compact table-style scanning.
Response viewing options with different display modes.
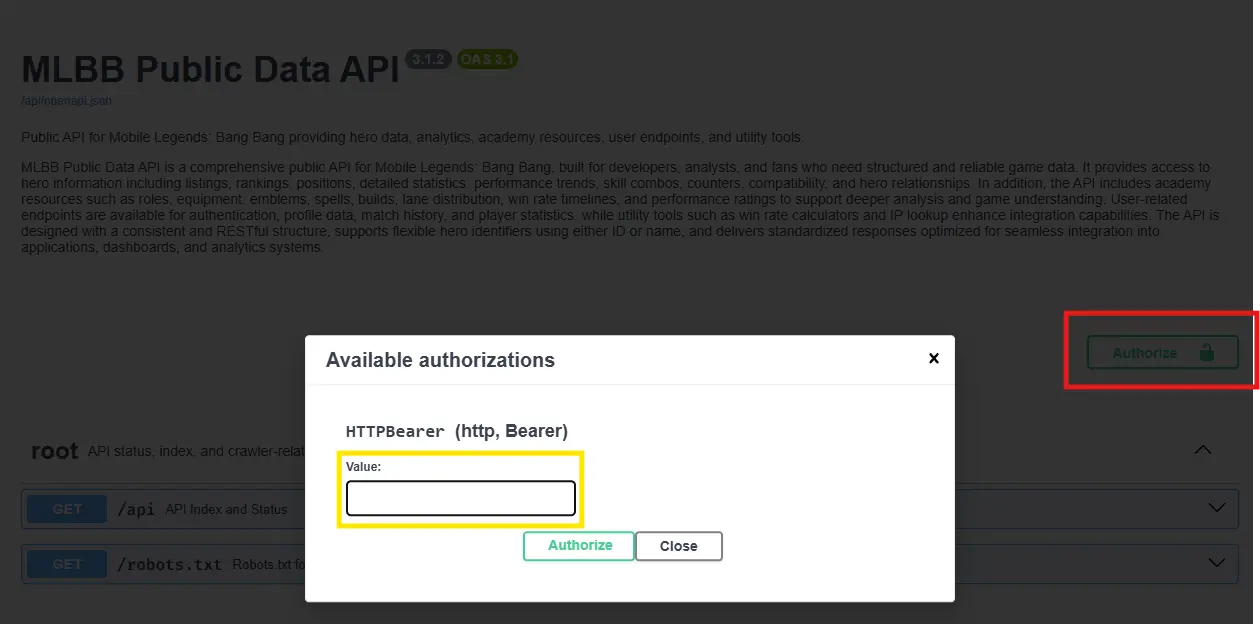
Step 6: Optionally Use API Docs
If you prefer Swagger UI, open API Docs from home. For user endpoints, authorize with Bearer token using JWT copied from navbar.
API docs authorization with Bearer token.
Step 7: Paste JWT for API Docs Authorization
In the API docs, click Authorize. Paste JWT in the Bearer token field. After successful auth, you can execute user endpoints directly from the docs interface.
API docs with JWT pasted in Bearer token field for authorization.